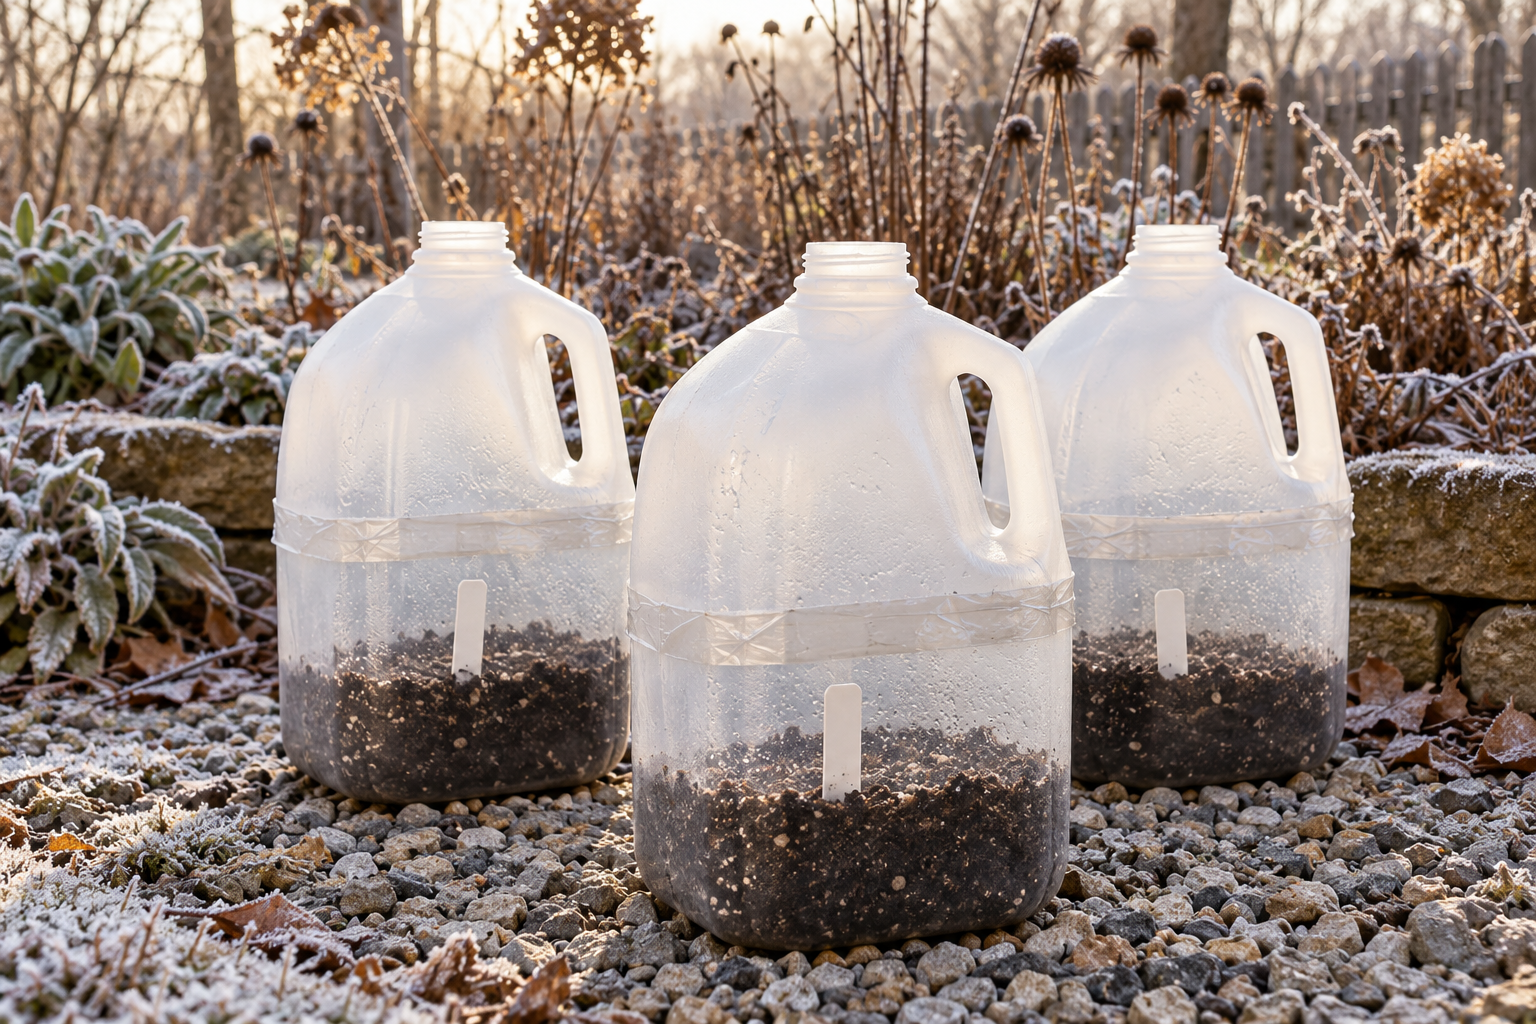
A cottage garden can begin with a few seed packets and a small row of recycled containers. Winter sowing lets you start suitable flowers outdoors while keeping your windowsills clear. The important decisions come before planting: choose seeds that suit your garden, check their germination instructions, and give them the right seasonal conditions.
This guide focuses on milk-jug sowing for U.S. gardeners. Start with three containers, each holding one flower species. Treat the first season as a small experiment, with a place in the border already chosen for each plant.
Affiliate disclosure: This article contains an affiliate link. If you buy through it, Tendrelia may earn a commission at no extra cost to you.
What is winter sowing?
Winter sowing means starting seeds outdoors in ventilated containers during winter. Some perennial seeds benefit from cold, moist conditions that help release dormancy; this is called cold-moist stratification. It is not the same as simply keeping a dry seed packet cold. Other seeds need different treatment or no chilling at all. University of New Hampshire Extension explains the distinction.
The container helps keep a small planting together, but it does not provide dependable frost protection for every seedling. Seed choice still matters.
When should you start?
Use regional advice and the seed packet together. Maryland Extension suggests late November through January for winter stratification. Illinois Extension recommends January or February for its winter-sowing approach, noting the risk of early germination during warm spells. These are regional examples, not a nationwide calendar.
In October, you can gather containers, choose seeds and write down their treatment requirements. Do not assume that preparing now means sowing everything now. In mild-winter areas, ask your local Extension office whether outdoor conditions will supply the chilling your selected seeds need. A packet-directed refrigerator treatment may be more appropriate.
Keep tender annuals such as zinnias out of your midwinter batch. Follow their spring sowing instructions instead. A plant’s winter hardiness as an established perennial does not tell you every requirement of its seed or young seedlings.
Which cottage garden flowers can you try?
Minnesota Extension lists purple coneflower (Echinacea purpurea), wild bergamot (Monarda fistulosa), black-eyed Susan (Rudbeckia hirta), prairie blazing star (Liatris spicata) and swamp milkweed (Asclepias incarnata) among flowers to consider for winter sowing.
Use that list as a starting point for checking your site, not as a shopping list to buy in full. Confirm the exact species, mature size, sun and moisture needs, regional suitability, and the supplier’s germination directions. Similar common names can conceal different requirements.
If purple coneflower suits your planting plan, shop purple coneflower seeds at True Leaf Market (affiliate link). Check the packet’s germination instructions before sowing.
For your first attempt, select only three flowers you actually have room to grow. Our cottage garden flowers from seed guide can help you consider the wider planting, including flowers best started at other times.
Prepare your milk-jug containers
Gather clean, translucent milk or water jugs, a cutting tool, tape, labels, seeds and a freely draining growing mix. Avoid opaque containers that exclude light. Illinois Extension describes a hinged jug with drainage holes and the cap removed.
Make the drainage holes before filling. Cut around the jug while leaving a section attached as a hinge, with enough depth below the cut for roughly 3–4 inches of mix. Work on a stable surface and keep your hands clear of the cutting tool.
Pre-moisten the mix and let excess water drain. It should be damp rather than saturated. Use a suitable seed-starting medium; do not fill the container with heavy garden soil. Leave room above the surface for seedlings.

Sow, label and place outdoors
Sow one species per container, using the packet’s spacing and depth instructions. Do not bury all seeds to the same depth: some need light to germinate. Label the plant and sowing date inside and outside the jug. Record any pretreatment separately.
Tape the cut seam closed while leaving the cap off for ventilation. Put the jugs where they receive daylight and precipitation but are protected from strong winds. Keep drainage openings clear. The aim is exposure to outdoor conditions, not a sealed container.
Assign each jug a simple number. In your notes, match that number to the seed packet and intended planting spot. This makes the experiment easier to follow if an outside label fades.
Care for the containers as spring approaches
Check moisture periodically rather than assuming rain will always reach the mix. Add water gently if needed, and investigate standing water. As temperatures rise, open the containers more to prevent overheating and gradually expose seedlings to open-air conditions.
Watch the weather especially closely after germination. If a damaging freeze is forecast, use protection appropriate to the seedlings; a thin plastic jug is not a heated greenhouse. Our frost-protection guide explains the limits of covers.
Do not discard an apparently empty jug just because another has sprouted. Different species can emerge at different times. Check the seed requirements and your records before deciding a batch failed.
Transplant with the finished border in mind
Move seedlings when they have developed true leaves and a root system you can handle, and when garden conditions suit the species. Ease them out carefully and follow the plant’s mature spacing requirements. Continue checking moisture after planting.
Plan the destination before lifting seedlings. Use our cottage garden border guide to think about position and repetition, then consult the perennial guide for the broader planting. A jug of seedlings does not mean every seedling needs to fit in one small bed.
Expect a growing-on period. Some perennials spend their early seasons building roots and foliage, so flowers in the first summer are not guaranteed.
A simple three-container plan
For each container, write five things: the exact plant name, its seed-treatment instructions, your sowing date, the first germination date, and where you intend to plant it. Add one short observation whenever you check it. These records will make next winter’s decisions more useful than simply sowing more containers.
Get the free Tendrelia seasonal planner by email to keep your planting wishlist and seasonal garden notes together. Subscribe to Tendrelia’s emails to receive the free PDF planner. You can unsubscribe at any time.
Before you begin
Choose suitable seeds first, prepare just a few ventilated containers, and follow the conditions in your own garden. Winter sowing is a way to learn how your flowers begin—not a guarantee that every seed will grow. A small, well-labelled batch is a useful first step toward a border you have planned with care.
Leave a Reply