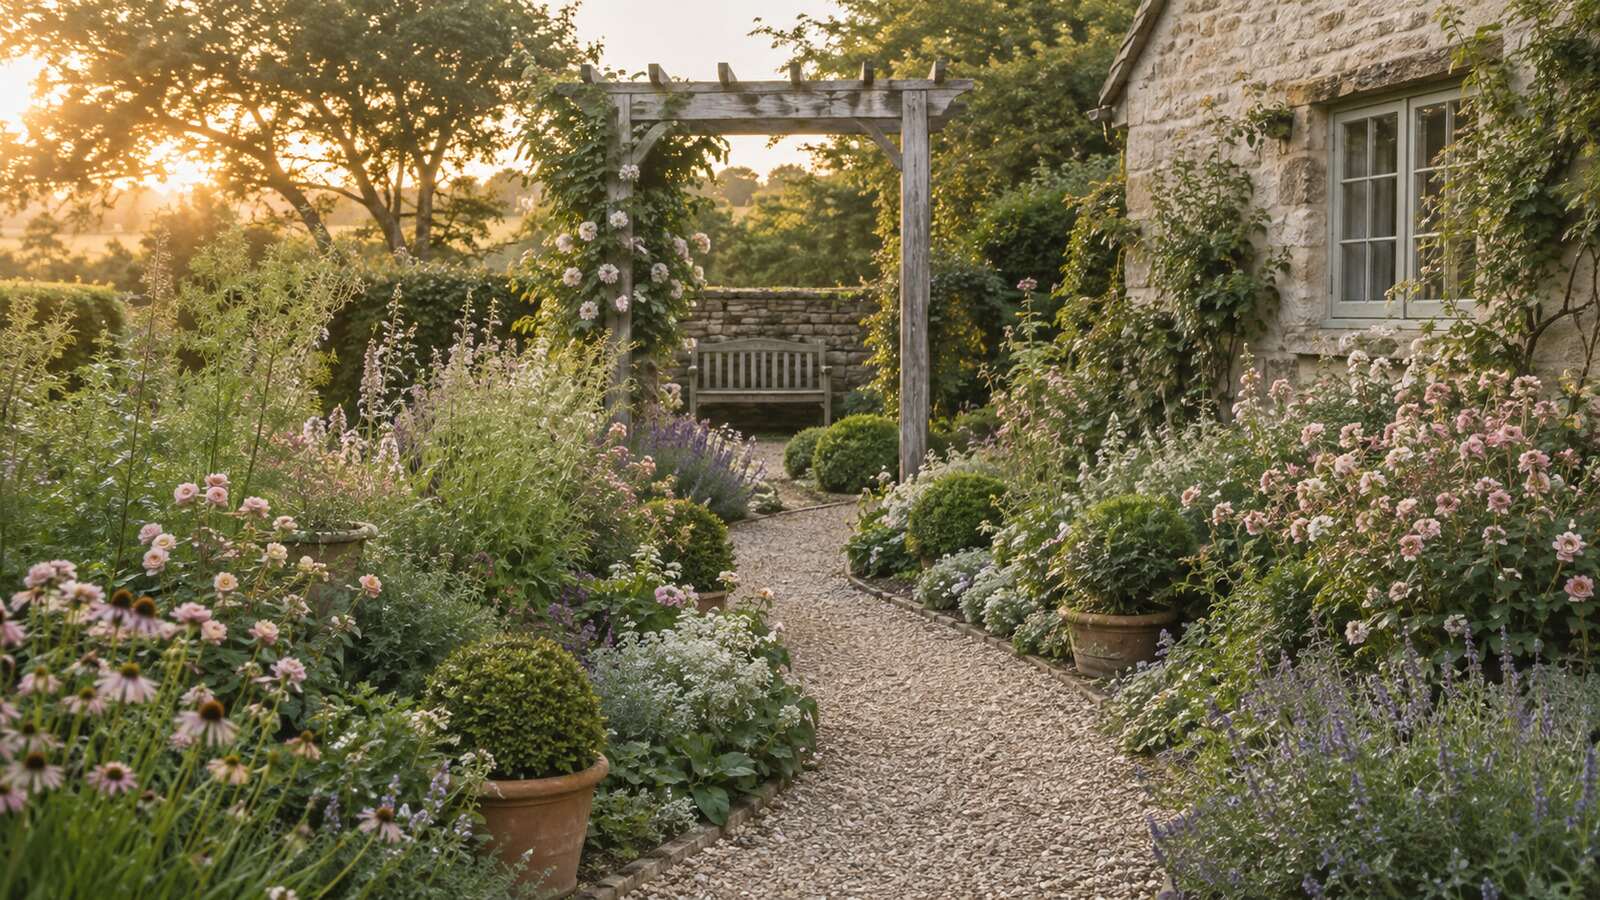
A cottage garden can look wonderfully relaxed, but the most inviting ones are not planted at random. Behind the overflowing flowers and winding paths is a simple layout that gives the garden shape, makes it comfortable to use and leaves enough room for everyday care.
A cottage garden can look wonderfully relaxed, but the most inviting ones are not planted at random. Behind the overflowing flowers and winding paths is a simple layout that gives the garden shape, makes it comfortable to use and leaves enough room for everyday care.
The good news is that you do not need formal design training or a large plot. You can create the feeling in a small front yard, a narrow side garden, a compact backyard or even one generous border. The secret is to begin with a few quiet anchors, then soften them with abundant planting.
If you are building the whole garden from the beginning, first read our guide on how to start a cottage garden for the wider planning process. Then return here to turn your ideas into a workable layout.
A rose-covered arch can also become a strong focal point in a small layout. Once it is positioned, learn how to train climbing roses on an arch for even, flower-filled coverage.
What makes a cottage garden layout feel natural?
Cottage style is known for generous planting, flowers that lean toward paths, climbers that soften walls and a mixture of ornamentals, herbs and useful plants. Yet some repetition is what keeps that abundance from feeling untidy. A recurring flower color, the same edging plant in several places or a few evergreen shapes can quietly hold the design together.
Think of the layout as the garden’s skeleton. Paths, boundaries, a small tree, an arch, a seat or a compact shrub provide the bones. Perennials, bulbs, annuals and self-seeding flowers add the softness. You need both: structure for calm and looseness for charm.
Before you draw: make a simple base plan
You do not need special software. A sheet of graph paper, a pencil and a tape measure are enough. Walk through the space and record what is already there before deciding what to add.

- Measure the approximate length and width of the garden or border.
- Mark doors, gates, windows, taps, drains, fences, trees and existing paths.
- Note where you naturally walk and which views you want to enjoy or soften.
- Record which areas receive full sun, partial shade or deeper shade during the growing season.
- Notice places that stay wet, dry quickly or are exposed to strong wind.
This base plan prevents one of the most common beginner problems: choosing a beautiful plant first and only later discovering that the site does not suit it. Match plants to the light, soil, moisture and space you actually have.
Step 1: Understand how the site behaves
Follow the light
Watch the garden at several times of day if possible. A sunny border can support many classic flowering plants, while a shadier corner may be better for foliage, woodland-style perennials or a quiet seat. Do not force one plant palette across the entire plot. Let each part of the garden suggest its own role.
Check soil and drainage
After rain, notice where water collects and where the surface dries first. Look at the soil texture and consider a local soil test before making major changes. Improving the soil with appropriate organic matter can help, but the easiest long-term garden still begins with plants adapted to the existing conditions.
Design for everyday life
A useful layout reflects how you live. Keep frequently used herbs near the kitchen, place a seat where it catches a favorite view and preserve a direct route to the gate, shed or water source. A garden that works naturally with your routine will be easier to enjoy and maintain.
Step 2: Choose one simple structure
Cottage planting can soften almost any underlying shape. A rectangular lawn, straight central path or simple pair of borders can still feel romantic once plants spill gently over the edges. Beginners often get better results from a clear base than from trying to draw too many complicated curves.
Divide the layout into three useful zones:
- A route: the main path or stepping-stone line that lets you move through the garden.
- Planting areas: borders, beds or containers arranged around that route.
- A destination: a bench, gate, birdbath, large container, arch or small tree that gives the eye somewhere to rest.
If the space feels disconnected, repeat one material or shape. For example, use the same warm brick around a bed and beneath a bench, or repeat one clipped evergreen shape at two points in the garden.
Step 3: Plan paths, edges and a focal point
Paths are not only practical; they decide how the garden is experienced. A direct route feels simple and purposeful. A gently curving route slows the eye and can make a small space feel more private. Whichever you choose, make it comfortable enough for carrying a watering can, tools or a garden trug.
Choose a relaxed path material
Gravel, reclaimed brick, natural stone, bark or simple stepping stones all suit cottage style. Choose a material that is safe for your climate and household, drains appropriately and can be maintained without constant repair. Allow a few soft edging plants to lean toward the path, but keep the walking surface clear.
Add one focal point
One memorable feature is usually stronger than several competing decorations. An arbor covered with a climber, a weathered bench, a birdbath, a planted container or a small ornamental tree can create a destination. Position it where it is visible from a doorway, window or turn in the path.
Step 4: Layer plants from tall to low
Once the structure is clear, fill the beds in layers. This creates the full cottage-garden look while keeping plants visible and accessible. Always check the mature height and spread on the plant label rather than judging by the size of a young nursery pot.

Use a simple three-layer formula
- Back or center: tall accents, airy grasses, climbers, compact shrubs or upright flowering plants.
- Middle: rounded perennials and long-flowering plants that provide most of the color.
- Front edge: lower plants, herbs, small bulbs and ground-covering forms that soften the path or bed line.
For dependable middle-layer ideas, explore our guide to the best perennials for a cottage garden. Choose varieties suited to your climate and growing conditions rather than copying a fixed plant list.
Repeat before you add more
A common beginner mistake is buying one of every plant. The result can look busy and is harder to maintain. Instead, select a small group of reliable plants and repeat them through the border. Repeating two or three colors also creates rhythm while leaving room for seasonal surprises.
Plan for more than one season
Combine permanent structure with plants that peak at different times. Spring bulbs, early perennials, summer flowers, autumn seed heads and a few evergreen or woody shapes can keep the layout interesting beyond a single flush of bloom. Leave some breathing room for plants to mature and for future discoveries.
Step 5: Plant in phases and edit as the garden grows
A cottage garden becomes better through observation. Planting the entire space at once can be expensive and makes it difficult to learn which plants truly thrive. Begin with the structure and one main border, then expand after a season of watching the light, soil and plant growth.
A practical first-season order
- Prepare the main path and make sure water can reach the planting areas.
- Plant the structural elements, such as a compact shrub, climber, small tree or repeated evergreen forms.
- Add the main perennial groups, giving each plant its mature spacing.
- Fill temporary gaps with annuals, bulbs or containers instead of overcrowding young perennials.
- Mulch appropriately, water new plants consistently and keep simple notes about what succeeds.
You do not need a shed full of equipment to begin. Our list of essential garden tools for beginners covers the practical basics for planting and maintaining your first beds.
Three easy cottage garden layout formulas
1. Small front-yard welcome
Keep a clear route from the street or driveway to the front door. Place lower plants beside the entrance so they do not obstruct the path, then build height toward the house, fence or corners. Repeat one flower color on both sides of the route and use a container, gate or climbing rose as the focal point.
2. Narrow side-garden journey
Use a simple path as the spine of the space. Plant one side more generously and use the opposite wall or fence for climbing plants, mirrors used safely, hanging containers or slim vertical supports. A small feature at the far end creates a sense of destination and makes the garden feel longer.
3. Compact backyard room
Create a small sitting area as the destination, then wrap borders around two or three sides. Use one taller planting group or small tree to provide privacy, keep the center visually open and repeat the same plants near the seat and along the entry path.
If your available area is especially limited, see these small cottage garden ideas for ways to use containers, walls and compact borders effectively.
Common cottage garden layout mistakes
- Starting with too many plant varieties instead of repeating a smaller, reliable palette.
- Making beds so deep that the middle cannot be reached comfortably for weeding and pruning.
- Ignoring mature plant size and crowding young plants for an instant full effect.
- Adding several competing focal points in a small garden.
- Using delicate path materials that become slippery, muddy or difficult to move across.
- Copying a plant list without checking local climate, soil, light, household safety or invasive-species guidance.
- Designing every inch before leaving room for the garden to change over time.
A simple one-week layout plan
If the full project still feels overwhelming, complete only these actions during your first planning week:
- Day 1: Measure the space and photograph it from each entrance or important window.
- Day 2: Record sun, shade, wind and wet or dry areas.
- Day 3: Draw the existing features and your natural walking route.
- Day 4: Choose one destination and one structural element.
- Day 5: Sketch the main bed shapes and three planting layers.
- Day 6: Choose a short list of repeated plants suited to the site.
- Day 7: Mark one small area to build first and postpone the rest.
A rose-covered arch can strengthen the route between garden rooms and add height without using much ground space. See our comparison of the best garden arches for climbing roses before choosing the size and material.
Final thoughts
The most beautiful cottage garden layout is not the one with the greatest number of flowers. It is the one that feels generous while still being easy to enter, care for and enjoy. Begin with a clear route, a little structure and a short list of plants you genuinely love.
Over time, bulbs will multiply, perennials will widen and a few self-seeders may find their own favorite corners. That gradual change is part of the charm. Give the garden a simple framework, then allow nature and experience to soften the edges.
Frequently asked questions
What is the best layout for a beginner cottage garden?
A simple path with borders on one or both sides is one of the easiest layouts to plan and maintain. Add one destination or focal point, then layer plants from tall to low and repeat a limited palette.
Can a small garden have cottage style?
Yes. Cottage style depends more on abundance, layering, repetition and natural materials than on garden size. One well-planted border, a few containers and a climber can create the feeling in a compact space.
Should cottage garden paths be straight or curved?
Either can work. Straight paths are practical and can be softened by generous planting. Gentle curves can slow the view and create a sense of discovery. Choose the route that fits the space and how you need to move through it.
How can I make a cottage garden look full without overcrowding?
Use repeated groups of plants, layered heights and temporary annuals or containers while perennials mature. Follow mature spacing guidance and fill visual gaps with mulch, bulbs or movable pots rather than planting permanent plants too closely.
The good news is that you do not need formal design training or a large plot. You can create the feeling in a small front yard, a narrow side garden, a compact backyard or even one generous border. The secret is to begin with a few quiet anchors, then soften them with abundant planting.
If you are building the whole garden from the beginning, first read our guide on how to start a cottage garden for the wider planning process. Then return here to turn your ideas into a workable layout.
What makes a cottage garden layout feel natural?
Cottage style is known for generous planting, flowers that lean toward paths, climbers that soften walls and a mixture of ornamentals, herbs and useful plants. Yet some repetition is what keeps that abundance from feeling untidy. A recurring flower color, the same edging plant in several places or a few evergreen shapes can quietly hold the design together.
Think of the layout as the garden’s skeleton. Paths, boundaries, a small tree, an arch, a seat or a compact shrub provide the bones. Perennials, bulbs, annuals and self-seeding flowers add the softness. You need both: structure for calm and looseness for charm.
Before you draw: make a simple base plan
You do not need special software. A sheet of graph paper, a pencil and a tape measure are enough. Walk through the space and record what is already there before deciding what to add.
- Measure the approximate length and width of the garden or border.
- Mark doors, gates, windows, taps, drains, fences, trees and existing paths.
- Note where you naturally walk and which views you want to enjoy or soften.
- Record which areas receive full sun, partial shade or deeper shade during the growing season.
- Notice places that stay wet, dry quickly or are exposed to strong wind.
This base plan prevents one of the most common beginner problems: choosing a beautiful plant first and only later discovering that the site does not suit it. Match plants to the light, soil, moisture and space you actually have.
Turn Your Layout Into a Seasonal Plan
Once your base plan is sketched, use the free Tendrelia Cottage Garden Seasonal Planner to keep planting priorities, seasonal jobs, projects and notes organized through the year.
Step 1: Understand how the site behaves
Follow the light
Watch the garden at several times of day if possible. A sunny border can support many classic flowering plants, while a shadier corner may be better for foliage, woodland-style perennials or a quiet seat. Do not force one plant palette across the entire plot. Let each part of the garden suggest its own role.
Check soil and drainage
After rain, notice where water collects and where the surface dries first. Look at the soil texture and consider a local soil test before making major changes. Improving the soil with appropriate organic matter can help, but the easiest long-term garden still begins with plants adapted to the existing conditions.
Design for everyday life
A useful layout reflects how you live. Keep frequently used herbs near the kitchen, place a seat where it catches a favorite view and preserve a direct route to the gate, shed or water source. A garden that works naturally with your routine will be easier to enjoy and maintain.
If ground-level planting and maintenance are part of that routine, compare our guide to garden kneelers and seats for planting for comfortable support that suits narrow borders and larger beds.
Step 2: Choose one simple structure
Cottage planting can soften almost any underlying shape. A rectangular lawn, straight central path or simple pair of borders can still feel romantic once plants spill gently over the edges. Beginners often get better results from a clear base than from trying to draw too many complicated curves.
Divide the layout into three useful zones:
- A route: the main path or stepping-stone line that lets you move through the garden.
- Planting areas: borders, beds or containers arranged around that route.
- A destination: a bench, gate, birdbath, large container, arch or small tree that gives the eye somewhere to rest.
If the space feels disconnected, repeat one material or shape. For example, use the same warm brick around a bed and beneath a bench, or repeat one clipped evergreen shape at two points in the garden.
Step 3: Plan paths, edges and a focal point
Paths are not only practical; they decide how the garden is experienced. A direct route feels simple and purposeful. A gently curving route slows the eye and can make a small space feel more private. Whichever you choose, make it comfortable enough for carrying a watering can, tools or a garden trug.
Choose a relaxed path material
Gravel, reclaimed brick, natural stone, bark or simple stepping stones all suit cottage style. Choose a material that is safe for your climate and household, drains appropriately and can be maintained without constant repair. Allow a few soft edging plants to lean toward the path, but keep the walking surface clear.
Add one focal point
One memorable feature is usually stronger than several competing decorations. An arbor covered with a climber, a weathered bench, a birdbath, a planted container or a small ornamental tree can create a destination. Position it where it is visible from a doorway, window or turn in the path.
Step 4: Layer plants from tall to low
Once the structure is clear, fill the beds in layers. This creates the full cottage-garden look while keeping plants visible and accessible. Always check the mature height and spread on the plant label rather than judging by the size of a young nursery pot.
Use a simple three-layer formula
- Back or center: tall accents, airy grasses, climbers, compact shrubs or upright flowering plants.
- Middle: rounded perennials and long-flowering plants that provide most of the color.
- Front edge: lower plants, herbs, small bulbs and ground-covering forms that soften the path or bed line.
For dependable middle-layer ideas, explore our guide to the best perennials for a cottage garden. Choose varieties suited to your climate and growing conditions rather than copying a fixed plant list.
Repeat before you add more
A common beginner mistake is buying one of every plant. The result can look busy and is harder to maintain. Instead, select a small group of reliable plants and repeat them through the border. Repeating two or three colors also creates rhythm while leaving room for seasonal surprises.
Plan for more than one season
Combine permanent structure with plants that peak at different times. Spring bulbs, early perennials, summer flowers, autumn seed heads and a few evergreen or woody shapes can keep the layout interesting beyond a single flush of bloom. Leave some breathing room for plants to mature and for future discoveries.
Step 5: Plant in phases and edit as the garden grows
A cottage garden becomes better through observation. Planting the entire space at once can be expensive and makes it difficult to learn which plants truly thrive. Begin with the structure and one main border, then expand after a season of watching the light, soil and plant growth.
A practical first-season order
- Prepare the main path and make sure water can reach the planting areas.
- Plant the structural elements, such as a compact shrub, climber, small tree or repeated evergreen forms.
- Add the main perennial groups, giving each plant its mature spacing.
- Fill temporary gaps with annuals, bulbs or containers instead of overcrowding young perennials.
- Mulch appropriately, water new plants consistently and keep simple notes about what succeeds.
For a low-profile watering system, see how to lay out and run a soaker hose in flower beds without overwatering. If you want the watering to run on a dependable schedule, compare our best hose timers for garden watering.
You do not need a shed full of equipment to begin. Our list of essential garden tools for beginners covers the practical basics for planting and maintaining your first beds.
Three easy cottage garden layout formulas
1. Small front-yard welcome
Keep a clear route from the street or driveway to the front door. Place lower plants beside the entrance so they do not obstruct the path, then build height toward the house, fence or corners. Repeat one flower color on both sides of the route and use a container, gate or climbing rose as the focal point.
2. Narrow side-garden journey
Use a simple path as the spine of the space. Plant one side more generously and use the opposite wall or fence for climbing plants, mirrors used safely, hanging containers or slim vertical supports. A small feature at the far end creates a sense of destination and makes the garden feel longer.
3. Compact backyard room
Create a small sitting area as the destination, then wrap borders around two or three sides. Use one taller planting group or small tree to provide privacy, keep the center visually open and repeat the same plants near the seat and along the entry path.
If your available area is especially limited, see these small cottage garden ideas for ways to use containers, walls and compact borders effectively.
Common cottage garden layout mistakes
- Starting with too many plant varieties instead of repeating a smaller, reliable palette.
- Making beds so deep that the middle cannot be reached comfortably for weeding and pruning.
- Ignoring mature plant size and crowding young plants for an instant full effect.
- Adding several competing focal points in a small garden.
- Using delicate path materials that become slippery, muddy or difficult to move across.
- Copying a plant list without checking local climate, soil, light, household safety or invasive-species guidance.
- Designing every inch before leaving room for the garden to change over time.
A simple one-week layout plan
If the full project still feels overwhelming, complete only these actions during your first planning week:
- Day 1: Measure the space and photograph it from each entrance or important window.
- Day 2: Record sun, shade, wind and wet or dry areas.
- Day 3: Draw the existing features and your natural walking route.
- Day 4: Choose one destination and one structural element.
- Day 5: Sketch the main bed shapes and three planting layers.
- Day 6: Choose a short list of repeated plants suited to the site.
- Day 7: Mark one small area to build first and postpone the rest.
Final thoughts
The most beautiful cottage garden layout is not the one with the greatest number of flowers. It is the one that feels generous while still being easy to enter, care for and enjoy. Begin with a clear route, a little structure and a short list of plants you genuinely love.
Over time, bulbs will multiply, perennials will widen and a few self-seeders may find their own favorite corners. That gradual change is part of the charm. Give the garden a simple framework, then allow nature and experience to soften the edges.
Frequently asked questions
What is the best layout for a beginner cottage garden?
A simple path with borders on one or both sides is one of the easiest layouts to plan and maintain. Add one destination or focal point, then layer plants from tall to low and repeat a limited palette.
Can a small garden have cottage style?
Yes. Cottage style depends more on abundance, layering, repetition and natural materials than on garden size. One well-planted border, a few containers and a climber can create the feeling in a compact space.
Should cottage garden paths be straight or curved?
Either can work. Straight paths are practical and can be softened by generous planting. Gentle curves can slow the view and create a sense of discovery. Choose the route that fits the space and how you need to move through it.
How can I make a cottage garden look full without overcrowding?
Use repeated groups of plants, layered heights and temporary annuals or containers while perennials mature. Follow mature spacing guidance and fill visual gaps with mulch, bulbs or movable pots rather than planting permanent plants too closely.
Leave a Reply