This post may contain affiliate links. As an Amazon Associate, I
earn from qualifying purchases.
A soaker hose can make watering a flower bed wonderfully simple, but
only when the layout, pressure and timing work together. Turn the tap
too high and the hose may spray instead of seep. Place one long line
through a wide border and some plants may stay dry. Run it by the clock
without checking the soil and you may water too little—or far more than
the roots need.
The good news is that a reliable setup does not have to be
complicated. Lay the hose close to the root zones, use gentle pressure,
cover it with mulch and test how deeply the water moves through your own
soil. Once you have calibrated the first few sessions, a timer can
handle most of the routine for you.
This guide explains how to use a soaker hose in flower beds step by
step, including practical layouts for narrow borders, wide cottage beds
and rose plantings.
Quick answer: Place the soaker hose directly on
reasonably level soil, route it through the plants’ root zones, secure
it with garden pins and cover it with mulch. Use the pressure
recommended by the hose manufacturer, run an initial test for about 30
minutes and then inspect the soil in several places. Adjust the duration
and frequency until moisture reaches the active root zone without
puddling or runoff.
Why Use a Soaker Hose in
a Flower Bed?
A soaker hose is a porous hose that releases water slowly along most
or all of its length. Instead of throwing water through the air, it
delivers moisture directly onto the soil.
That makes it especially useful in densely planted flower beds where
overhead sprinklers may wet foliage, paths and empty patches between
plants. Root-zone watering also reduces splashing and keeps more of the
surrounding area dry, which can mean fewer opportunistic weeds.
Soaker hoses are most effective in relatively level beds with closely
spaced plants that need similar amounts of water. If your border is
steep, extremely long or planted with a mixture of drought-tolerant and
moisture-loving plants, separate irrigation zones or adjustable drip
emitters may offer better control.
If you still need the hose itself, compare our seven
recommended soaker hoses for flower beds before planning
the installation.
What You Need for a Reliable
Setup
The hose is only one part of a dependable watering system. Most
flower beds benefit from the following components:
- A soaker hose of an appropriate length
- A regular leader hose between the tap and the flower bed
- A hose-end pressure regulator when required by the hose
manufacturer - A backflow-prevention device where required by local plumbing
rules - A filter if sediment or mineral debris may enter the hose
- A timer for automatic shutoff or scheduled watering
- A splitter if one tap will serve more than one area
- U-shaped garden pins to hold the hose in position
- Organic mulch to reduce surface evaporation
Keep every threaded connection accessible. Fittings hidden beneath
soil or deep mulch are harder to inspect, flush and repair.
Helpful accessory: The Orbit 58910 two-outlet programmable hose
timer can automate watering times and run two garden-hose zones from
one tap.
Step 1:
Measure the Bed Before Buying or Laying Hose
Measure the actual route the hose will follow rather than simply
measuring the outside dimensions of the bed. A winding route around
groups of roses and perennials requires more hose than a straight
border.
Sketch the bed on paper and mark:
- The water source
- The closest and farthest plants
- Wide or densely planted sections
- Changes in elevation
- Paths or bare spaces that do not need watering
- Plants with unusually high or low water needs
The leader hose should carry water from the tap to the planting area.
The porous soaker section should begin only where watering is
needed.
Avoid solving a large layout with one extremely long run. Flow often
weakens toward the far end of a soaker hose. Shorter sections or
separate zones usually produce more even coverage and are easier to
troubleshoot.
Step 2: Choose the
Right Soaker Hose Layout
There is no single layout that suits every garden. The right pattern
depends on the bed’s width, soil and planting density.
Narrow flower borders
For a narrow border with plants arranged in one or two informal rows,
one gently curving hose may provide enough coverage. Position it close
enough for moisture to spread into the root zones without pressing it
against crowns or stems.
Wide cottage-garden beds
A wide, densely planted bed usually needs two or more parallel runs.
Twelve inches between runs is a sensible initial layout for intensive
beds, but it is a starting point rather than a universal rule. Sandy
soil may need closer spacing because water moves downward quickly, while
heavier soil may allow wider spacing because moisture spreads farther
sideways.
Roses and larger shrubs
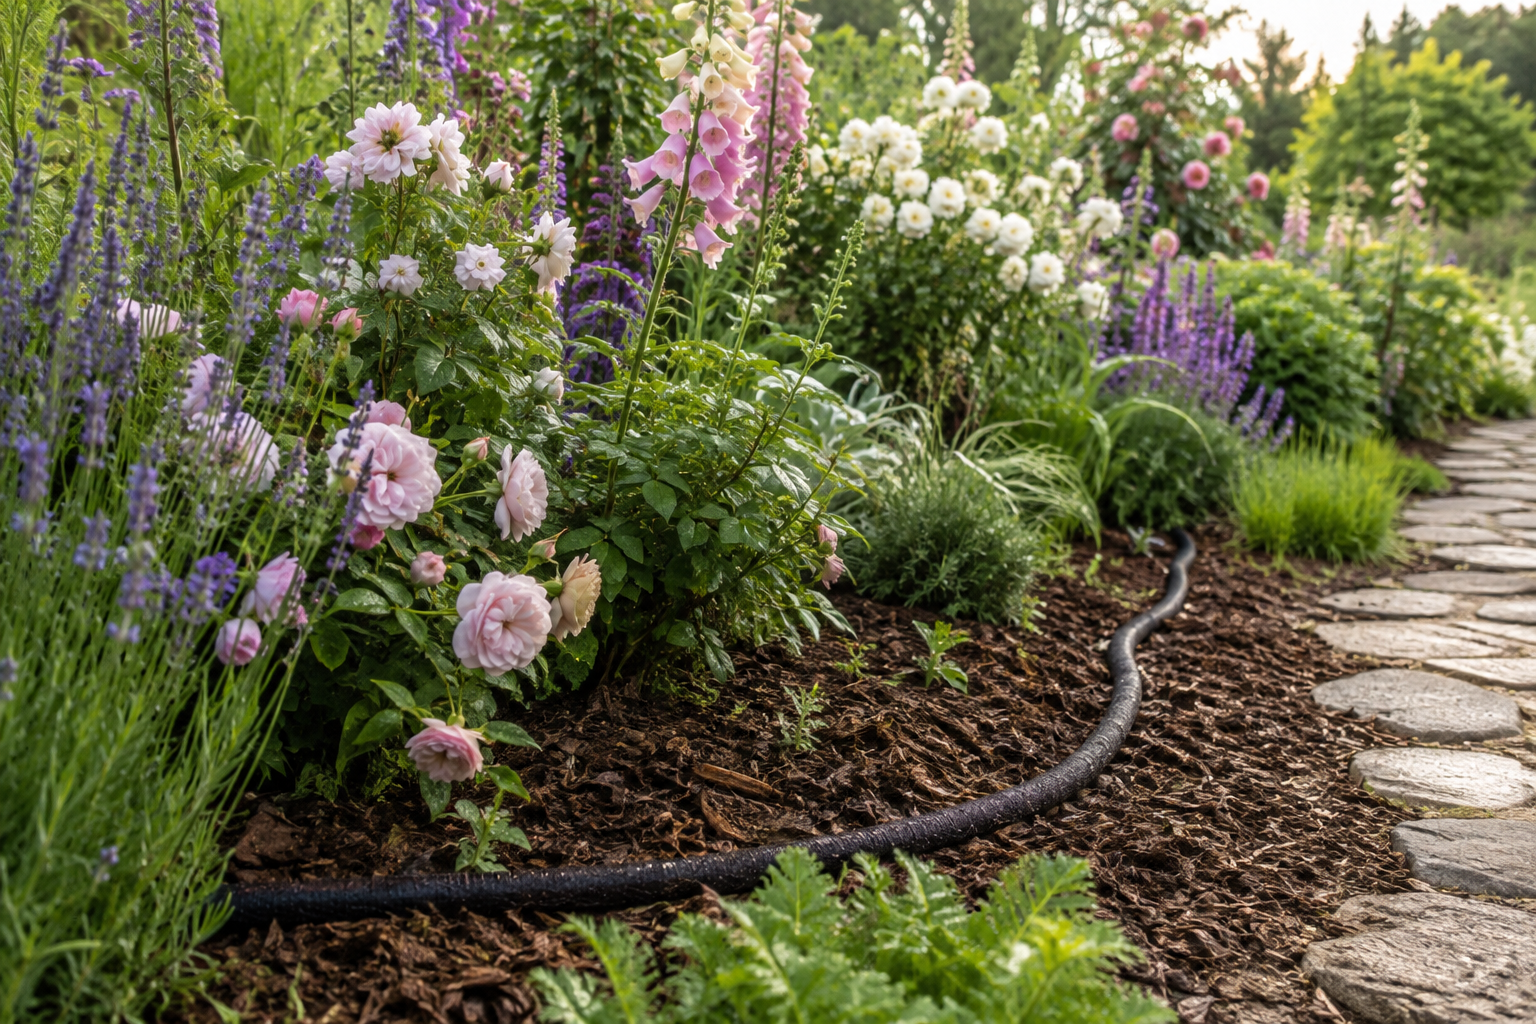
Guide the hose around the outer portion of each plant’s root area
rather than coiling it tightly against the main stem. A broad curve
encourages moisture to reach more feeder roots. Keep the hose away from
graft unions and woody crowns that should not remain constantly
damp.
Irregular beds and grouped
planting
Use loose curves around plant groups and bypass unplanted pockets.
Avoid sharp bends and kinks, which can restrict flow. Where the route
requires a tight turn, use a short connector or elbow rather than
forcing the porous hose into a fold.

Step 3: Lay the Hose on the
Soil
Lay the hose directly on the soil surface before adding mulch. This
lets you observe the first test and correct dry spots, leaks or sharp
bends.
Uncoil a stiff hose in the sun for a short time so it becomes easier
to position. Connect it to water, remove the end cap and flush it
briefly before final placement. Flushing clears loose material that
could interfere with even seepage.
Pin the hose every few feet and at curves. The pins should hold it in
place without flattening or crushing it.
Do not place the hose on top of landscape fabric. Water may travel
unpredictably across the fabric instead of soaking naturally into the
soil. If the bed already contains fabric, position the hose beneath it
where practical.
Helpful accessory: The MySit 6-inch U-shaped galvanized
irrigation stakes are sized for 1/2-inch to 1-1/2-inch soaker hoses
and help hold the layout securely against the soil.
Step 4:
Connect the Components in a Sensible Order
A typical connection runs from the tap through the control and
protection components before reaching the porous hose:
- Outdoor tap
- Backflow-prevention device, if required
- Timer
- Filter
- Pressure regulator
- Splitter or zone valve, depending on the installation
- Leader hose
- Soaker hose
- Removable end cap

Component instructions sometimes specify a different order, so follow
the manuals supplied with your timer, regulator and filter. Use intact
rubber washers and tighten garden-hose connections by hand before
reaching for tools. Overtightening can distort washers and create new
leaks.
If one tap supplies several hoses, water the zones separately unless
the available flow can operate them evenly at the same time.
Helpful accessory: The Biswing heavy-duty brass two-way hose
splitter provides two independently controlled outlets when one tap
needs to serve separate watering zones.
Step 5: Use Gentle,
Controlled Water Pressure
Soaker hoses are designed to seep, not spray. Excessive pressure can
cause uneven output, leaking fittings or ruptures. Very low flow,
however, may leave the far end dry.
Check the pressure range supplied by the hose manufacturer. Do not
assume that opening the tap halfway creates a specific pressure, because
household water systems vary. A hose-end regulator provides more
consistent control.
A 25 PSI regulator is a common low-pressure garden-irrigation setup,
but it should only be used when compatible with the chosen hose. Some
hoses contain their own flow-restricting washer or disc. Removing that
small part without checking the instructions may change how the entire
hose performs.
During the test, the hose surface should become evenly damp. Fine
spraying or small jets indicate excessive pressure, damage or clogged
sections.
Helpful accessory: When a 25 PSI regulator matches
the hose manufacturer’s recommendation, the Rain Bird HT07525PSI pressure
regulator provides a simple 3/4-inch hose-thread connection for
controlling pressure.
Step 6: Test the
System Before Adding Mulch
Turn on the water and walk the full length of the hose. Look for:
- Even seepage from beginning to end
- Dry sections near the far end
- Kinks or crushed areas
- Leaks around connectors
- Puddles forming in low spots
- Water reaching paths or structures
Run the first test for approximately 30 minutes, then turn the water
off and wait briefly for moisture to spread through the soil. Check
several locations—not only the wettest point next to the hose.
Use a small trowel or soil probe to see how far the moisture has
travelled downward and sideways. The goal is to moisten the active root
zone without leaving the surface waterlogged. If only the top layer is
damp, extend the next session. If the soil becomes saturated or water
runs onto a path, shorten the session or divide it into two cycles.

How Long Should a Soaker Hose
Run?
There is no trustworthy universal runtime. Output changes with hose
construction, length, pressure, soil texture and the number of zones
operating at once. Weather, plant maturity, shade and mulch depth also
change how quickly the bed dries.
Use thirty minutes as an initial calibration test—not as a permanent
schedule. Record how deeply and evenly the water moved, then adjust in
small increments.
Sandy soil
Water moves downward quickly and the surface can dry rapidly. Sandy
beds may need closer hose spacing or somewhat more frequent sessions.
Check whether moisture spreads far enough sideways to reach plants
between the lines.
Loamy soil
Loam usually offers a useful balance of drainage and moisture
retention. Begin with the calibration test and adjust according to
root-zone moisture and local weather.
Clay soil
Clay absorbs water more slowly and is prone to surface pooling or
runoff. Two shorter cycles separated by a soaking period can work better
than one continuous session. Stop if water begins moving across the
surface.
Established perennials generally benefit from deeper, less frequent
watering rather than a brief daily sprinkle. New plantings need closer
observation while roots become established. Always account for rainfall
before running the system again.
How Often Should You
Water Flower Beds?
Frequency should follow the soil and plants rather than a rigid
calendar. Check the bed before each scheduled cycle until you understand
how long it retains moisture.
Watering needs usually increase during hot, windy weather and
decrease during cool or cloudy conditions. Newly planted annuals,
perennials and shrubs may need more frequent attention than established
plants. Shaded borders usually dry more slowly than exposed south-facing
beds.
A timer makes the routine easier, but automation should not replace
inspection. Pause scheduled watering after useful rainfall and revise
the program as seasons change.
Add Mulch After the Layout
Works
Once the test shows even coverage, cover the hose with a loose layer
of organic mulch. Mulch helps shade the hose, slows surface evaporation
and keeps the irrigation line out of view.
Use shredded bark, wood chips, leaf mould or another mulch
appropriate to the planting. Keep mulch away from plant crowns and
trunks. Leave hose connectors, filters and end caps visible so they
remain easy to inspect and flush.
Placing a hose beneath mulch is different from burying it deeply in
soil. Deep burial makes leaks and clogs difficult to locate. If the
manufacturer permits shallow burial, document the route before covering
it.
Using a Timer Without
Overwatering
A timer is particularly useful when a soaker hose needs to run longer
than hand watering. It prevents the familiar mistake of turning on the
tap and forgetting it.
Choose a timer that provides:
- Adjustable runtime and watering days
- Manual watering without erasing the schedule
- Rain-delay control
- A clear display
- Separate outlet programming if you have several zones
Program the schedule only after calibrating the bed. If a timer
controls multiple hoses, stagger their start times to maintain more
consistent flow.
Common Soaker Hose Mistakes
Turning the tap fully open
High pressure does not necessarily water the bed faster. It can
produce sprays, leaks and uneven delivery. Use the correct regulator or
built-in restrictor.
Using one long hose for every
bed
Very long runs and elevation changes reduce uniformity. Split large
gardens into shorter zones.
Leaving the hose above the
mulch
An exposed hose loses some of the mulch’s moisture-saving and
sun-protection benefits. Test it first, then cover it lightly.
Watering by minutes alone
The same runtime can produce different results in different soils.
Probe the soil and adjust the schedule.
Mixing plants with very
different needs
Lavender and other drought-tolerant plants should not share the same
schedule as moisture-loving flowers unless their root areas can be
bypassed.
Hiding every fitting
Filters, connectors and end caps require occasional inspection. Keep
them accessible.
Troubleshooting Uneven
Watering
The beginning is wet
but the end is dry
Shorten the run, check for a kink or split the hose into separate
zones. Confirm that the regulator is compatible and that too many hoses
are not operating simultaneously.
The hose sprays instead of
seeping
Reduce the pressure and inspect the spraying point for damage. A
strong jet from one spot usually indicates a rupture rather than normal
operation.
The whole hose has weak
output
Clean the filter, check the tap, inspect the leader hose and flush
the soaker hose through its open end. Mineral buildup or sediment may be
restricting flow.
Water pools in one section
The area may be lower, compacted or receiving overlapping coverage.
Reposition the line and use shorter cycles if the soil absorbs water
slowly.
Plants between hose lines
remain dry
Move the runs closer together or add another line. Measure moisture
sideways from the hose after a test rather than guessing from the
appearance of the surface.
Seasonal Maintenance
At the beginning of the watering season, reconnect the system, remove
the end cap and flush each zone. Replace cracked washers and check
timers for battery corrosion.
During the season, walk the beds occasionally while the system
operates. Mulch and foliage can hide leaks, and a timer may continue
running even when a connector has failed.
Before freezing weather, disconnect, drain and store removable timers
and regulators according to their instructions. Drain the hose
thoroughly and coil it loosely without sharp folds.
Frequently Asked Questions
Should a soaker hose be
buried?
The simplest setup is on the soil surface beneath mulch. Some
products permit very shallow burial, but deep burial makes inspection
and repair difficult. Follow the hose manufacturer’s instructions.
Should the holes face up or
down?
Many modern soaker hoses release water through porous material rather
than a single row of visible holes. If your hose has designated outlet
holes or stripes, use the orientation stated by its manufacturer.
Can I connect
several soaker hoses together?
You can connect compatible hoses, but long combined runs often
deliver less water at the far end. Separate shorter zones generally
provide more uniform watering.
Can a soaker hose go uphill?
Small changes may be manageable, but significant elevation
differences cause uneven delivery. Use multiple short, separately
regulated sections on sloping beds.
Can I leave a
soaker hose in place all year?
It can remain beneath mulch during the growing season. In freezing
climates, disconnect and drain the system before winter and store
vulnerable components as directed by their manufacturers.
How can I
tell whether the bed received enough water?
Inspect the soil below the surface with a trowel or probe in several
places. The soil should be moist through the active root area without
being saturated or producing runoff.
A Simple Setup
That Becomes Almost Effortless
The best soaker-hose schedule is the one calibrated to your own
flower bed. Start with a thoughtful layout, gentle pressure and a timed
test. Then inspect the soil, correct weak areas and cover the working
system with mulch.
Once those details are settled, the hose can water quietly beneath
the planting while foliage, flowers and paths stay largely dry. A timer
can make the routine nearly hands-free, but a quick seasonal adjustment
and an occasional walk along the line will keep it reliable.
Ready to choose the right hose for your garden? Compare the
7
best soaker hoses for flower beds, including options for
narrow borders, curved beds, long runs and larger irrigation zones.
Leave a Reply